Table of contents
Hello Guys,
I hope you all have seen the NEXTJS conference and all the new things that are shipped with the release of NEXTJS 13, NEXTJS 13 had breaking changes and it changes how we used to work with NEXTJS before and React in general
Introduction to NEXTJS 13
Here are some cool features which are launched with NEXTJS 13 launch.
1. Turbo Pack
Introducing Turbopack: Rust-based successor to Webpack
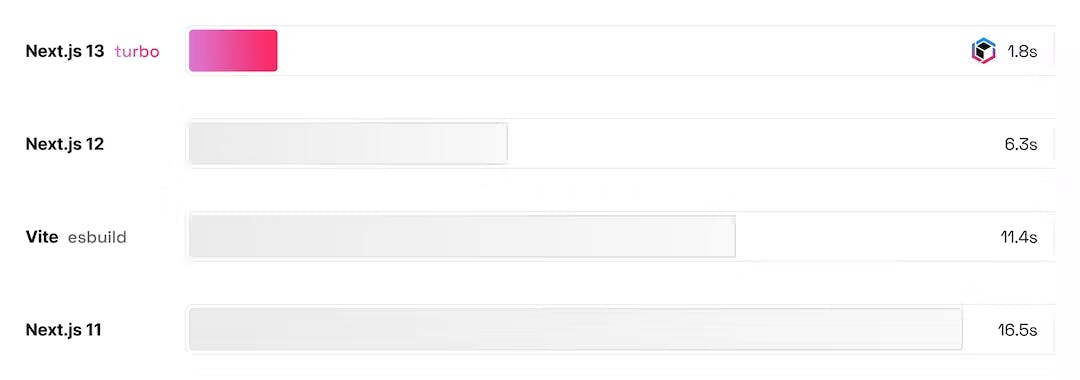
Turbo Pack is a bundler-like web pack but it's powered by Rust and It is said to be 700x faster than Webpack and 10x faster than the famous bundler Vite.
below is the comparison drawing for the turbo pack and other bundlers.

Though Turbo might feel amazing, webpack has a vast plugin ecosystem that turbopack lacks for now but Vercel Team is working hard to build those. This is also the reason we can't use preprocessor and Tailwind like we used to use in the Next 12 and earlier versions.
2. Nested Routes
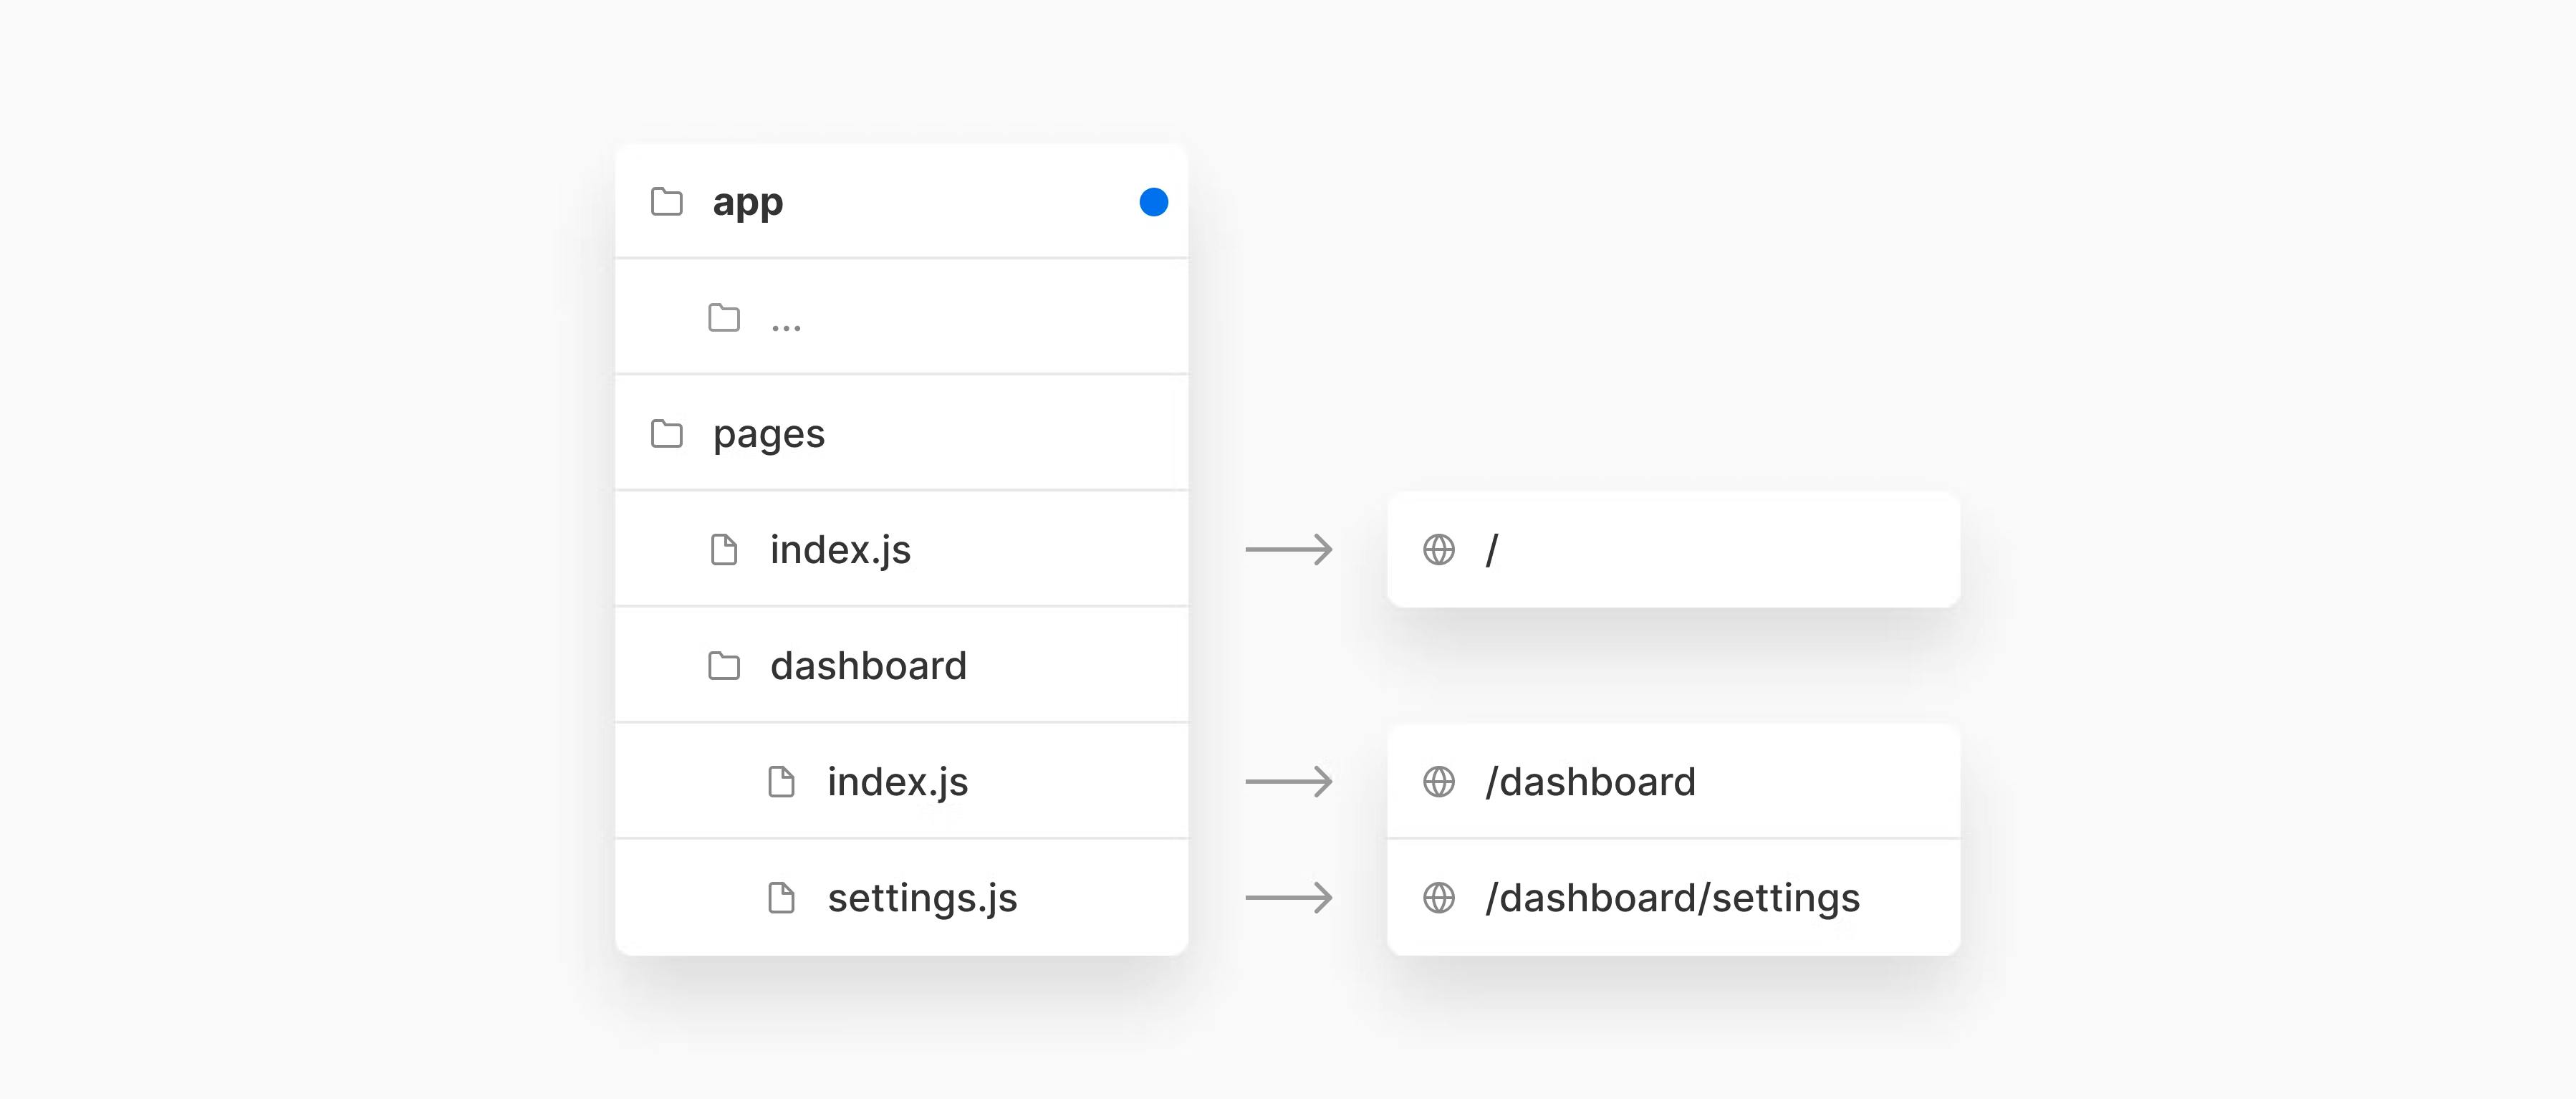
Nested routes are the best and most awaited feature we developers were waiting for though it is already been used in several other frameworks like Remix and it's finally in NEXTJS 13 now.
You will be having a simple app directory that is still in beta where you can define the layout and nested routes easily.

there are other features like dynamic OG image generation, Image, Layout, server components, and so on.., but with new technology, there is some trade-off as well, and one is we can't use Tailwind like we used to but there is a workaround to do that.
In this article, we will be discussing that workout and will be implementing that too.
Installing TailwindCSS With NEXTJS 13
Let's get started with the TailwindCSS and NEXTJS 13 with turbo pack
Note: Tailwind works fine with the simple command npm run dev but with flag --turbo it won't work as the turbo pack doesn't support the tailwind yet.
Now that we know that let's start with the basic installation.
if you are liking this article till now let's connect on Twitter :).
Installing NEXTJS 13
Open your favorite terminal and let's get started with the installation of NEXTJS 13. The following command will also generate the app directory where you can perform nested routes and other new features.
npx create-next-app@latest --experimental-app
Once that you can cd into the my-app which is now created.
Installing tailwind CSS in NEXTJS 13
Now we will install Tailwind in NEXTJS 13.
npm install -D tailwindcss postcss autoprefixer
npx tailwindcss init
run the above code inside your terminal which will create a new tailwind.config.js file for you.
Setting Up Tailwind CSS in NEXTJS 13
Once the installation is done we need to set up the tailwind with PostCSS. Create a new file called postcss.config.js and paste the following content into that.
// postcss.config.js

module.exports = {
  plugins: {
    tailwindcss: {},
    autoprefixer: {},
  },
};
once that is done we will configure the tailwind.config.js as per NEXTJS 13 requirements. Here we will be adding an experimental app dir too.
// tailwind.config.js

/** @type {import('tailwindcss').Config} */
module.exports = {
  content: ["./pages/**/*.{js,ts,jsx,tsx}", "./app/**/*.{js,ts,jsx,tsx}"],
  theme: {
    extend: {},
  },
  plugins: [],
};
Add the Tailwind directives to your CSS
once that is done Add the Tailwind directives to your CSS, just open the ./app/global.css and paste the below code on top.
/* ./app/global.css */

@tailwind base;
@tailwind components;
@tailwind utilities;
Setting up the input and output CSS files for the postCSS process.
Now the trick is to concurrently compile our Tailwind CSS and add that to our file using the npm package called concurrently.
Go ahead and install concurrently by running the following command.
npm i concurrently
once that is done make a new file in the app directory and call it output.css after that open your package.json and make changes as follows
// package.json

"dev": "concurrently \"next dev\" \"tailwindcss --input ./app/globals.css --output ./app/output.css --watch\"",
"build": "tailwindcss ./app/globals.css --output ./app/output.css && next build",
Add Compiled CSS to layout.tsx
import Head from "next/head";
// import "./globals.css";
import "./output.css";

export default function RootLayout({
  children,
}: {
  children: React.ReactNode;
}) {
  return (
    <html lang='en'>
      <Head>
        <title>Create Next App</title>
        <meta name='description' content='Generated by create next app' />
        <link rel='icon' href='/favicon.ico' />
      </Head>
      <body>{children}</body>
    </html>
  );
}
as you can see that I have commented on the global.css and imported output.css.
Testing our Code
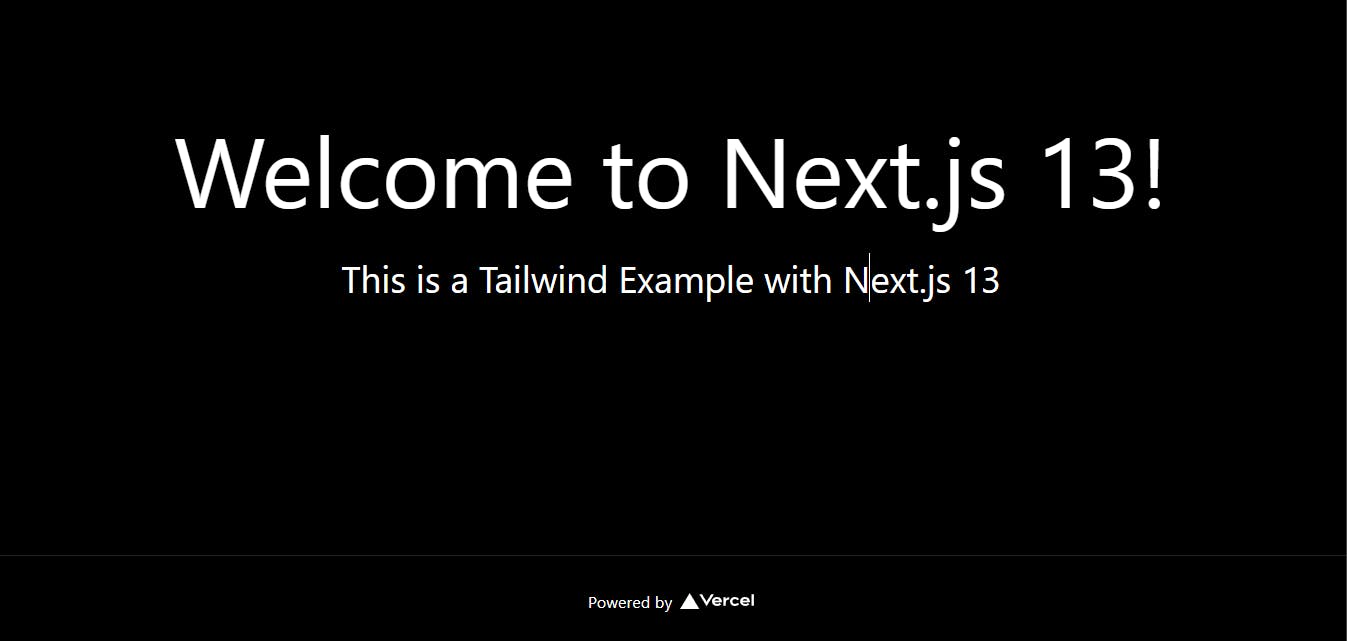
Open the page.tsx inside the app directory and add some TailwindCSS utility classes to your codebase and run npm run dev --turbo to see those changes.
Note: Make sure you are adding --turbo flag to use the turbo pack.
// page.tsx

import Image from "next/image";
import styles from "./page.module.css";

export default function Home() {
  return (
    <div className='w-full bg-black'>
      <main className='flex justify-center items-center m-auto h-screen flex-col'>
        <div className='text-8xl '>
          Welcome to <a href='https://nextjs.org'>Next.js 13!</a>
        </div>
        <div className='text-4xl my-10 '>
          This is a Tailwind Example with Next.js 13
        </div>
      </main>

      <footer className={styles.footer}>
        <a
          href='https://vercel.com?utm_source=create-next-app&utm_medium=default-template&utm_campaign=create-next-app'
          target='_blank'
          rel='noopener noreferrer'
        >
          Powered by{" "}
          <span className={styles.logo}>
            <Image src='/vercel.svg' alt='Vercel Logo' width={72} height={16} />
          </span>
        </a>
      </footer>
    </div>
  );
}
Preview

TL;DR
Use concurrently with postCSS so that each time it gets compiled the commands are as follows
// package.json

"dev": "concurrently \"next dev\" \"tailwindcss --input ./app/globals.css --output ./app/output.css --watch\"",
"build": "tailwindcss ./app/globals.css --output ./app/output.css && next build",
If you liked this post and got to learn something new give it a like and let's connect on Twitter. %[twitter.com/theysaymaurya/status/1438924150..

